My Dayspring sweater is finished and I love it! It’s cosy, comfortable, and colourful, and will be perfect for winter walks and choir practices in chilly halls. The pattern is Dayspring by Ainur Berkimbayeva, available here on Ravelry and in Pom Pom Quarterly Issue 36 (Spring 2021).
Read MoreKnitted treasure
Have you been following the Yarn Love Challenge on Instagram? I've been doing my best to keep up with the prompts for the last couple of months, and it's been great for sparking ideas for my daily photos and also discovering other yarn-loving people through the hashtag.
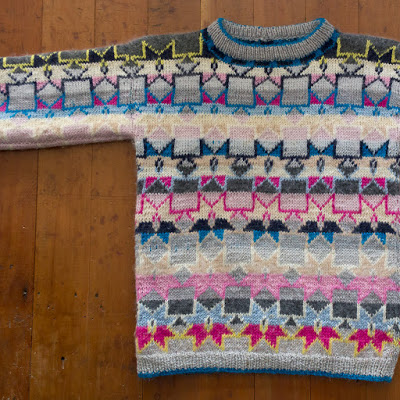
The challenge prompt for April 30th was "made for me", which gave me the idea of showing off an amazing sweater which my Mum made for me, almost 30 years ago...
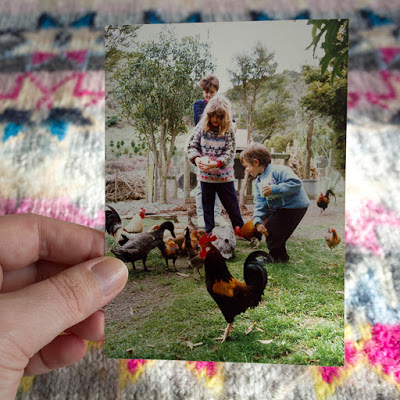
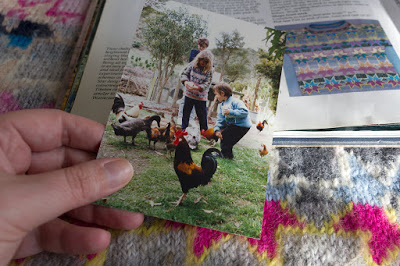
That's me and my brother feeding the chooks!
I'm a big fan of the harmonious colour palette, with its brights toned down with greys and pastels. Isn't it beautiful?
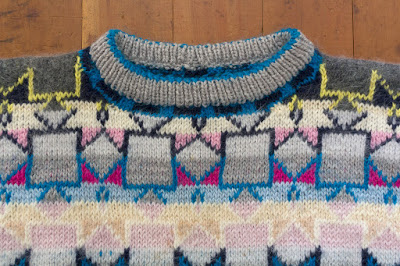
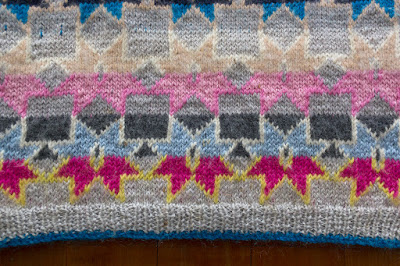
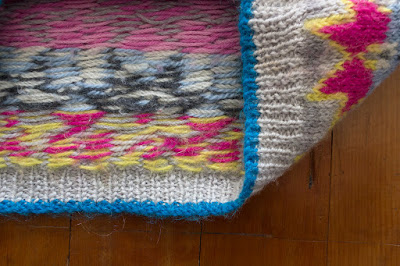
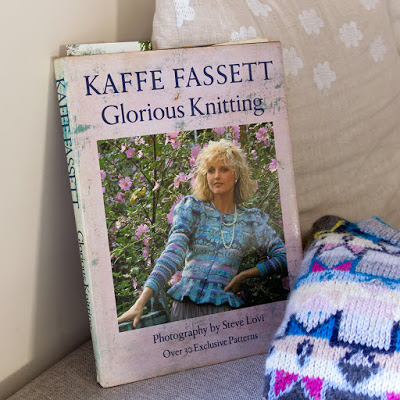
The pattern is 'Outlined Star' from Kaffe Fassett's 1985 book Glorious Knitting (Ravelry link). It's one of the gems from Mum's collection of retro knitting books which we get out now and then to marvel over. Some of the 80s books are more valuable as comedy than inspiration right now, but Glorious Knitting still stands up in my opinion! I love the photography and colours, and I'm in awe of some of the designs. If you're keen for some top-notch colourwork inspiration, you might be able to find it at your local library or second-hand bookshop.
There are certain knitting techniques that are generally considered difficult or advanced at the moment, that weren't so much when I was growing up. This sweater incorporates two of them: stranded colourwork knit flat, and 3-colour stranding. And because Mum was comfortable with these techniques, I didn't shy away from them when I first learned to knit. Thanks Mum!
My first attempt at colourwork of any kind was an Inga Hat (Ravelry link), which I tried to adapt for flat knitting, but got horribly confused by the braid at the brim. Later, when I'd learned to knit in the round, my first completed colourwork project was an Opus Spicatum hat (Ravelry link) in a full rainbow of colours instead of the original two - which resulted in working 3-colour (and even a few 4-colour) rounds. It was a massive challenge, but I managed to finish it with the help of online tutorials and sheer bloody-mindedness. Hooray for adventurous newbies! ;)
Finished project: Royally Striped
You guys, I actually finished a garment! This only happens once or twice a year, I am sloooow when it comes to garment knitting - mostly because I have so many other things I want to knit, and if they're my own designs I prioritise them. Which is totally great! But I think I need to get back to doing purely ME-knitting on the weekends, because I'd love a couple more jerseys and cardies in my wardrobe.
This is my Royally Striped cardie (Ravelry link), designed by Stephen West and knit in a combo of Morris and Sons Norway 8ply (the natural charcoal and brown colours) and Vintage Purls Max (the burgundy and golds). The golds are actually the leftovers from my Beeswax Set, now put to good use. :)
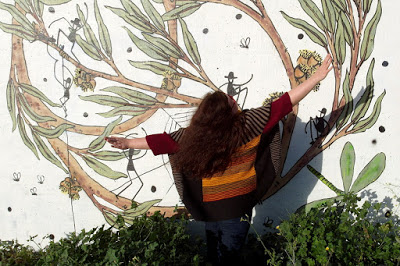
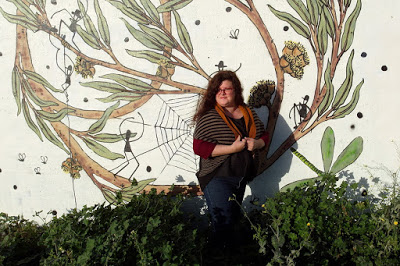
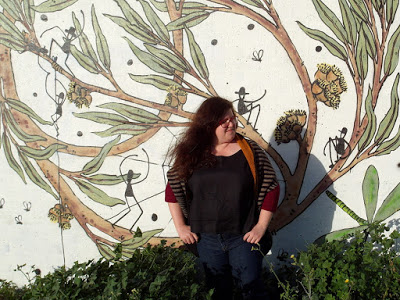
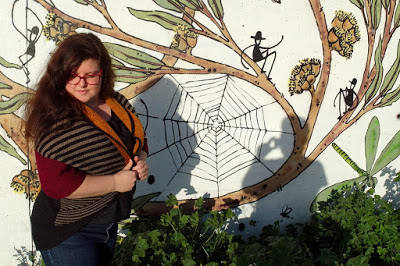
Isn't this mural neat? It's across the train tracks from our place, on the side of some storage units. I like the little people climbing around in the eucalyptus branches.
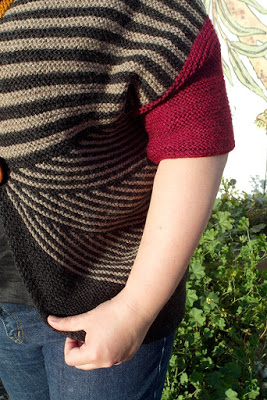
Royally Striped is an all-in-one-piece design, where you knit one section and then pick up stitches for the next section. It's quite magical, the way it grows and grows. I really like the i-cord bind off around all of the edges, it finishes it off really tidily. I did add a big wooden button, but I prefer the way it looks unbuttoned.
The striped short-row wedges were fun to knit - don't they look cool?
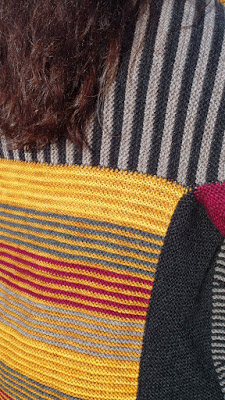
Here's a closer look at the back, with its block of colourful narrow stripes:
I do love the cuddliness of garter stitch!

Next up will be another one of these (Ravelry link). Not as exciting (especially as I've knit one before), but it will be a great basic super-wearable jersey. And my yarn is speckled, so scratch that - it IS exciting!
Craft holiday II
My post-Christmas break in NZ is nearly over, so it must be time to show off all the things I made! Like my previous craft holiday, I took full advantage of having access to Mum's sewing machine. This time I made tops using downloadable indie patterns. I haven't had much experience sewing from patterns (as opposed to following photo tutorials on blogs or just figuring things out myself) - so I learned a lot along the way. :)
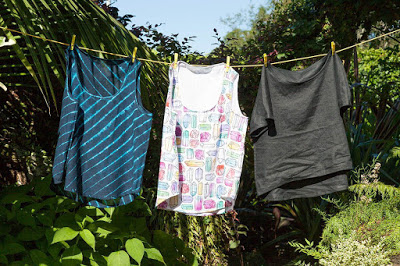
I started off making a Wiksten top out of some lightweight cotton fabric with a diagonal tie-dye stripe. I enlarged the pattern one extra size, which worked well - hooray for drawing skills! The fit is pretty good, certainly good enough for a casual top.
I dove into making a second one, this time using a crystal-print cotton sateen fabric from Spoonflower and plain white bias binding. Mum thought the fabric was far too heavy for a Wiksten top, and (surprise, surprise) she was totally right - it didn't drape well, so the not-quite-right fit around the armholes was very obvious. She fixed the problem by demonstrating how to put in some small darts above the bust line - thanks Mum!
I moved on to another pattern for my next sewing adventure, a Fen top in a black linen-cotton blend. Instead of following the pattern's instructions I kind of did my own thing while sewing it up. This worked out very well with the bias binding around the neckline (which is super tidy if I do say so myself):
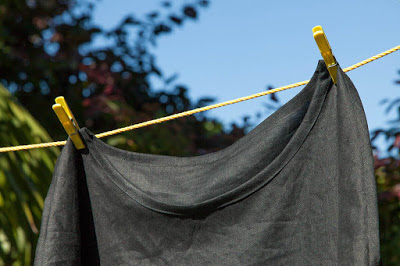
However, I messed up with the seams - I decided to do French seams again, but didn't realise it would cause problems with the curved underarm seams. Luckily the fabric looks the same on both sides, so I just decided to turn the top inside-out and continue. It's not a mistake, I declare, it's a design decision to have my French seams on the outside. ;)
Again, my fabric was a bit too heavy for the pattern, but I think it looks ok this time. It's certainly a very comfortable, roomy top. I'll be looking out for lighter, drapier fabrics to make more Fen tops the next time I do some sewing.
Learnings:
using proper patterns isn't hard or scary
I can enlarge a pattern if necessary by looking at the outlines of the other sizes and just drawing one size further
bias binding isn't hard to get nice and tidy (if you use the iron a lot)
fabric choice is IMPORTANT - pay attention to the pattern's fabric suggestions, and Mum's warnings
French seams are awesome, but not for curved underarm seams
linen / linen blends are easy to work with
bust darts are my friends
--------------------------------------------------------------------------------------------
I've also been knitting away on a new scarf design which I plan to release in the next week or two, once it's all photographed and polished up. Here's a peek at the scarf-in-progress...
Craft holiday
My stay in Whakatane is drawing to an end, and on Saturday I'll be flying back to Melbourne. As always, I've done a lot of crafting while hanging out with Mum & Dad, sitting in my favourite knitting spot in the sun-room or bent over the sewing machine.
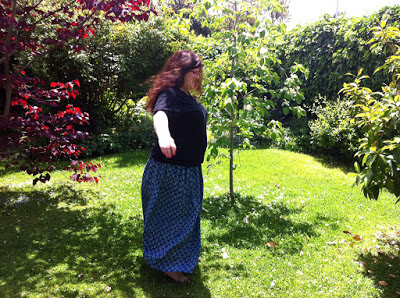
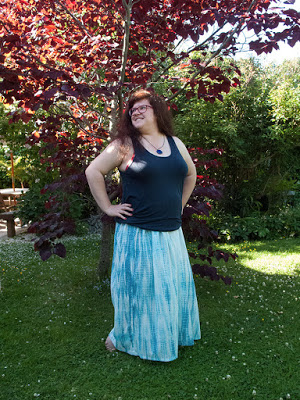
As part of my getting-ready-for-summer project, I sewed a couple of lightweight cotton skirts. I used the Purl Bee's tutorial Gathered Skirt for All Ages, and adapted it for a longer length and no pockets. My skirts are super comfy to wear, and were quite straightforward to make for a semi-beginner like me. Each one took me two days of tinkering. :)
I also want to finish sewing my ill-fated silk cowl, which will hopefully work out this time around!
Last week I finished knitting a hat-and-mitts set, tweaked their patterns, and had a photoshoot with Dad behind the camera (which is always fun). I'm planning to release the patterns in December, so I don't want to give too much away just yet. Here's a tiny peek...
Finally, here are a few photos from Mum and Dad's garden. Yesterday I played around with Dad's smaller camera - it's never hard to find interesting things to photograph in a garden...
As part of my getting-ready-for-summer project, I sewed a couple of lightweight cotton skirts. I used the Purl Bee's tutorial Gathered Skirt for All Ages, and adapted it for a longer length and no pockets. My skirts are super comfy to wear, and were quite straightforward to make for a semi-beginner like me. Each one took me two days of tinkering. :)
Last week I finished knitting a hat-and-mitts set, tweaked their patterns, and had a photoshoot with Dad behind the camera (which is always fun). I'm planning to release the patterns in December, so I don't want to give too much away just yet. Here's a tiny peek...
Finally, here are a few photos from Mum and Dad's garden. Yesterday I played around with Dad's smaller camera - it's never hard to find interesting things to photograph in a garden...
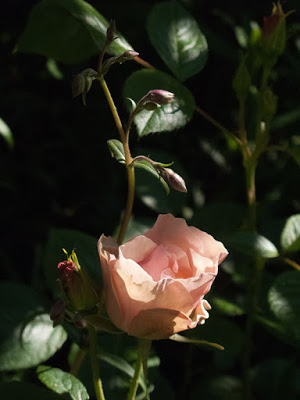 |
| A rose called 'Greensleeves' |
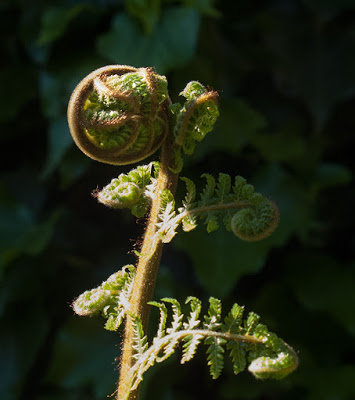 |
| A fern frond unfurling |
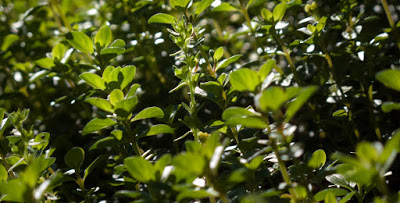 |
| Plenty of thyme |