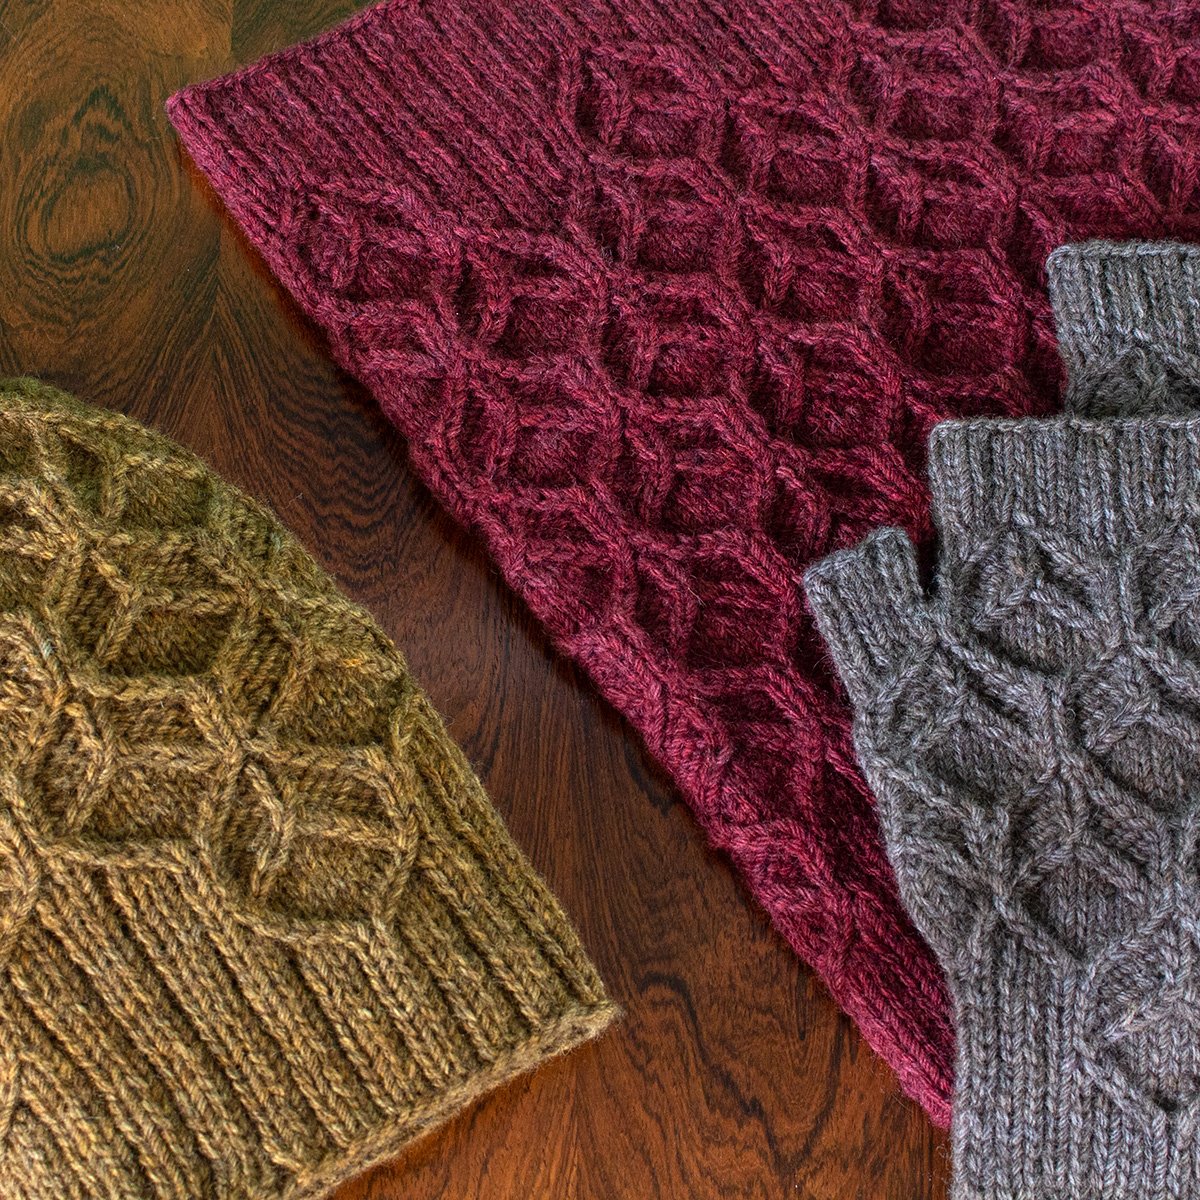
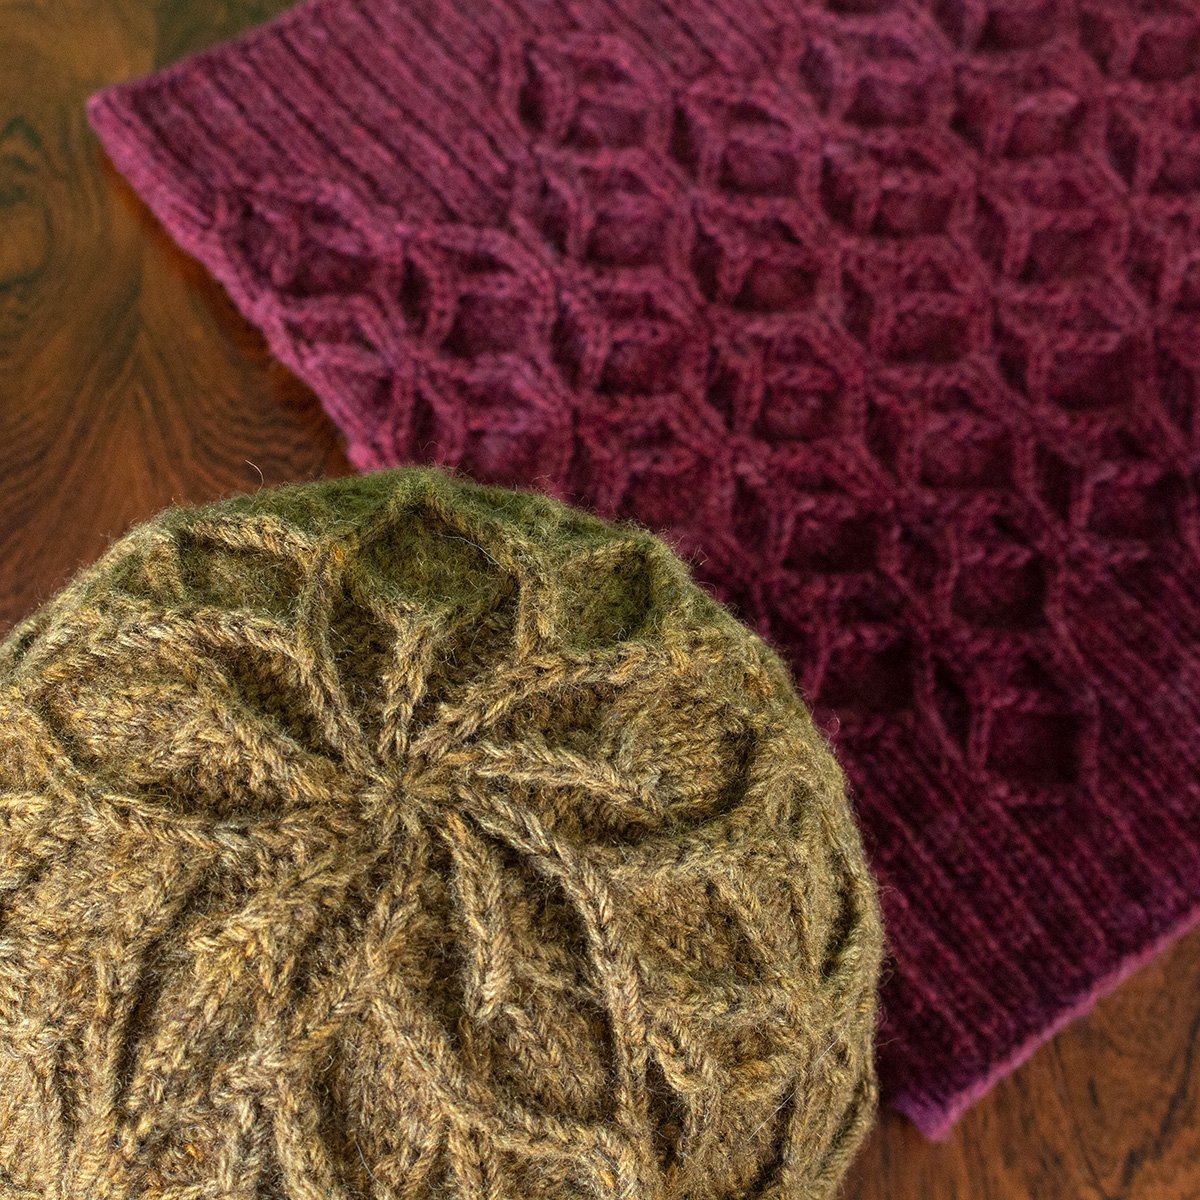
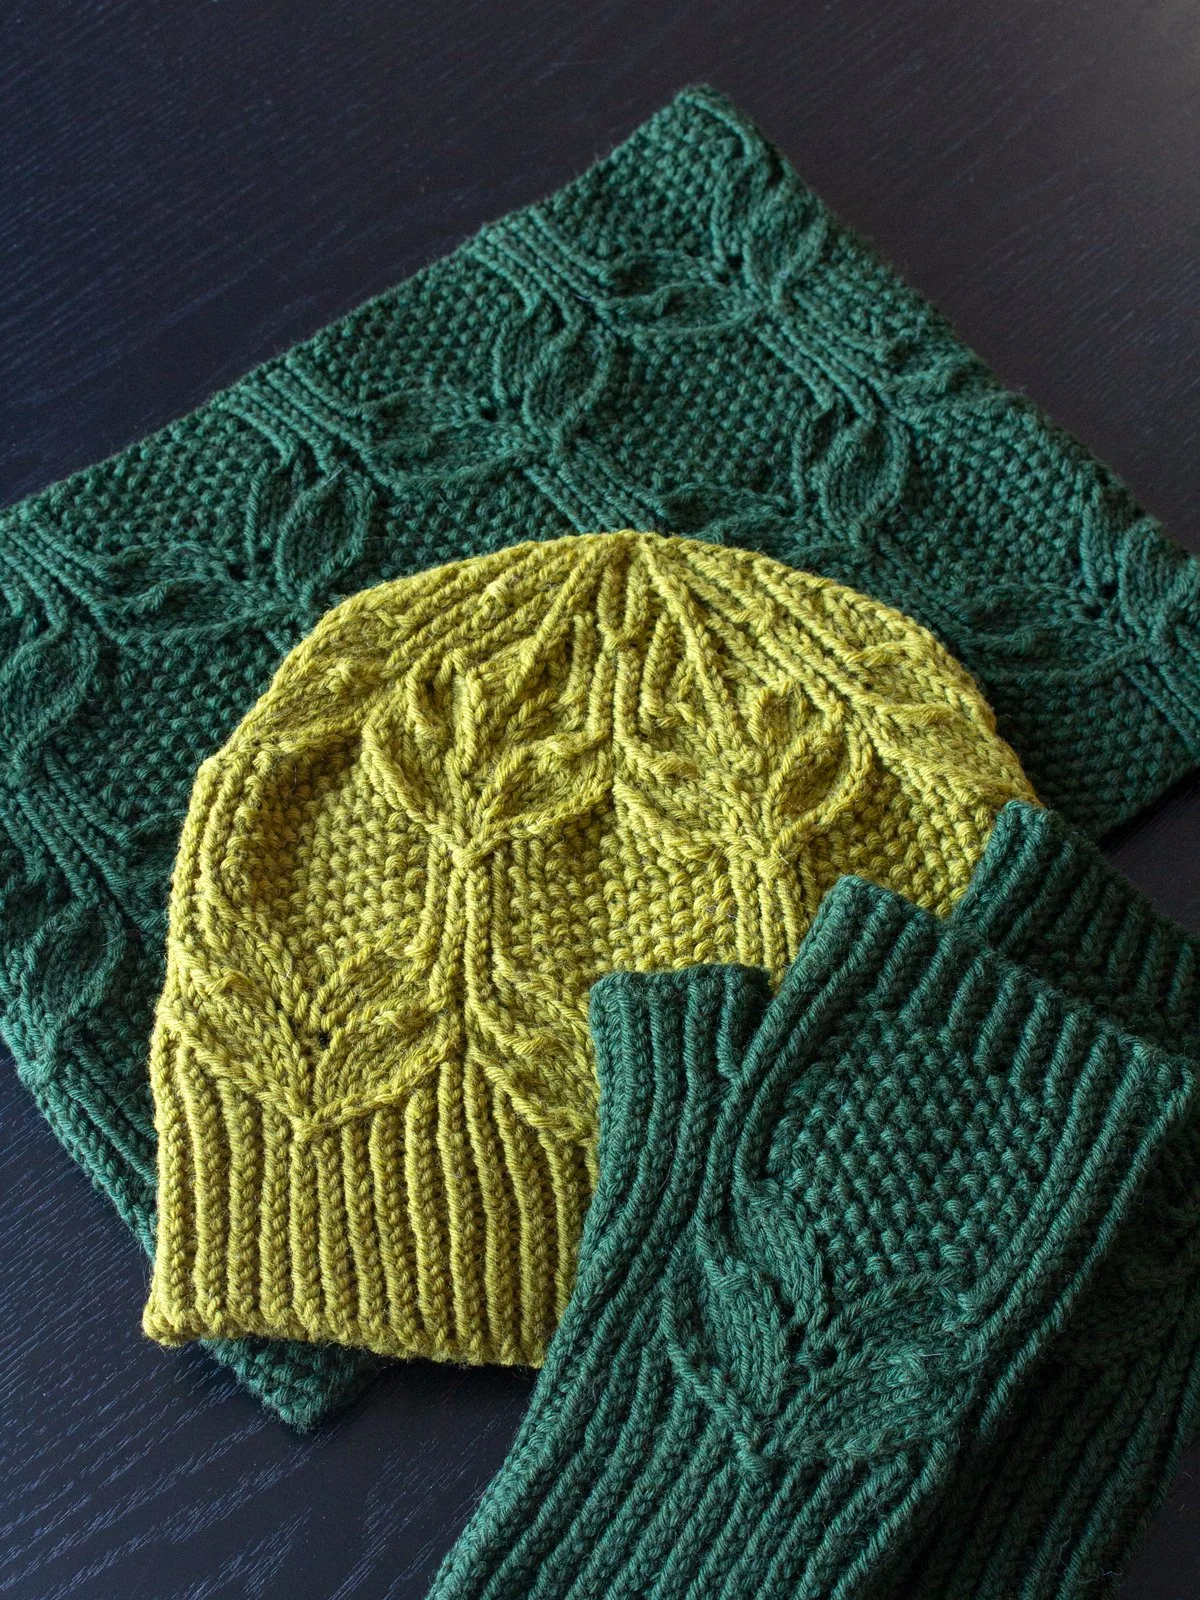
The Greenery Set is a trio of hat, cowl, and mitts featuring a rich texture of cable-and-lace leaves, seed stitch, and half-twisted ribbing. This combination of stitches may sound complex but it’s much simpler to knit than you might think, because in any one round you’ll only be using one technique at a time - e.g. you’ll be working either two-stitch cables, or simple lace, or a small number of cluster stitches amongst the knits and purls. Instructions for my favourite method of working two-stitch cables are included in each pattern, with no cable needle required.
I’m so proud of these designs, and I feel they’re very ‘classic me’ - the texture, the flowing lines, the botanical inspiration!
Inspiration & design journey
I’m a sucker for a botanically-themed stitch pattern, whether in cables or lace or colourwork, and it’s something I always end up returning to in my knitting designs. It may seem like overkill to use both cables and lace for a stitch pattern like this, but using both really was the best solution to create the shapes I wanted to make - the resulting leafy motifs are not too ‘open’ at the base thanks to the cables, and curve elegantly thanks to the lace.
I hadn’t originally planned to add a pair of mitts to the set, but after knitting the cowl sample I found myself eyeing up the leftover yarn and sketching some possible mitts designs. Luckily I had enough yarn for the pair, once I unravelled my swatches!
The yarn
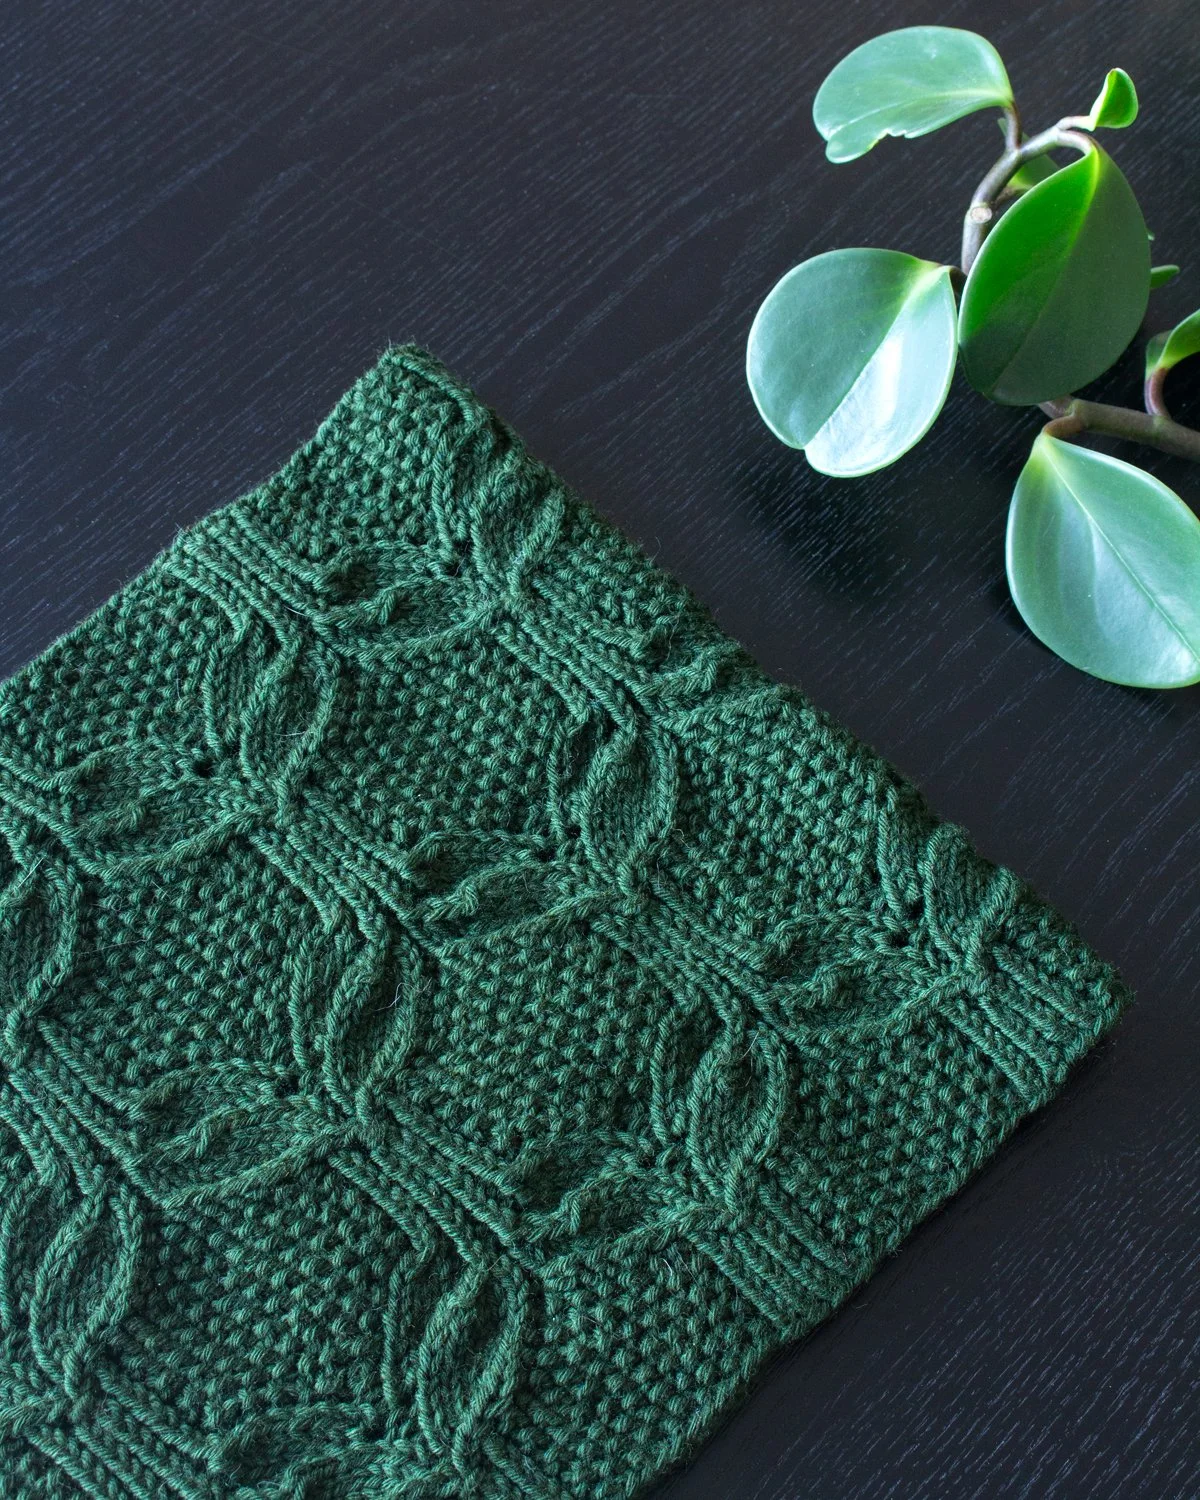
For each of the three samples I used ChristalLK Peregrine DK, a special yarn created by my designer friend Christelle Nihoul using wool from a French breed of sheep called Est à Laine Merino. After many deliberations I settled on the colours Douglas, a deep forest green, and Mousse, a lighter yellow-leaning mossy green, and this non-superwash worsted-spun yarn turned out to be a perfect match for all of the texture in these designs. A 4ply version of the yarn is also available.
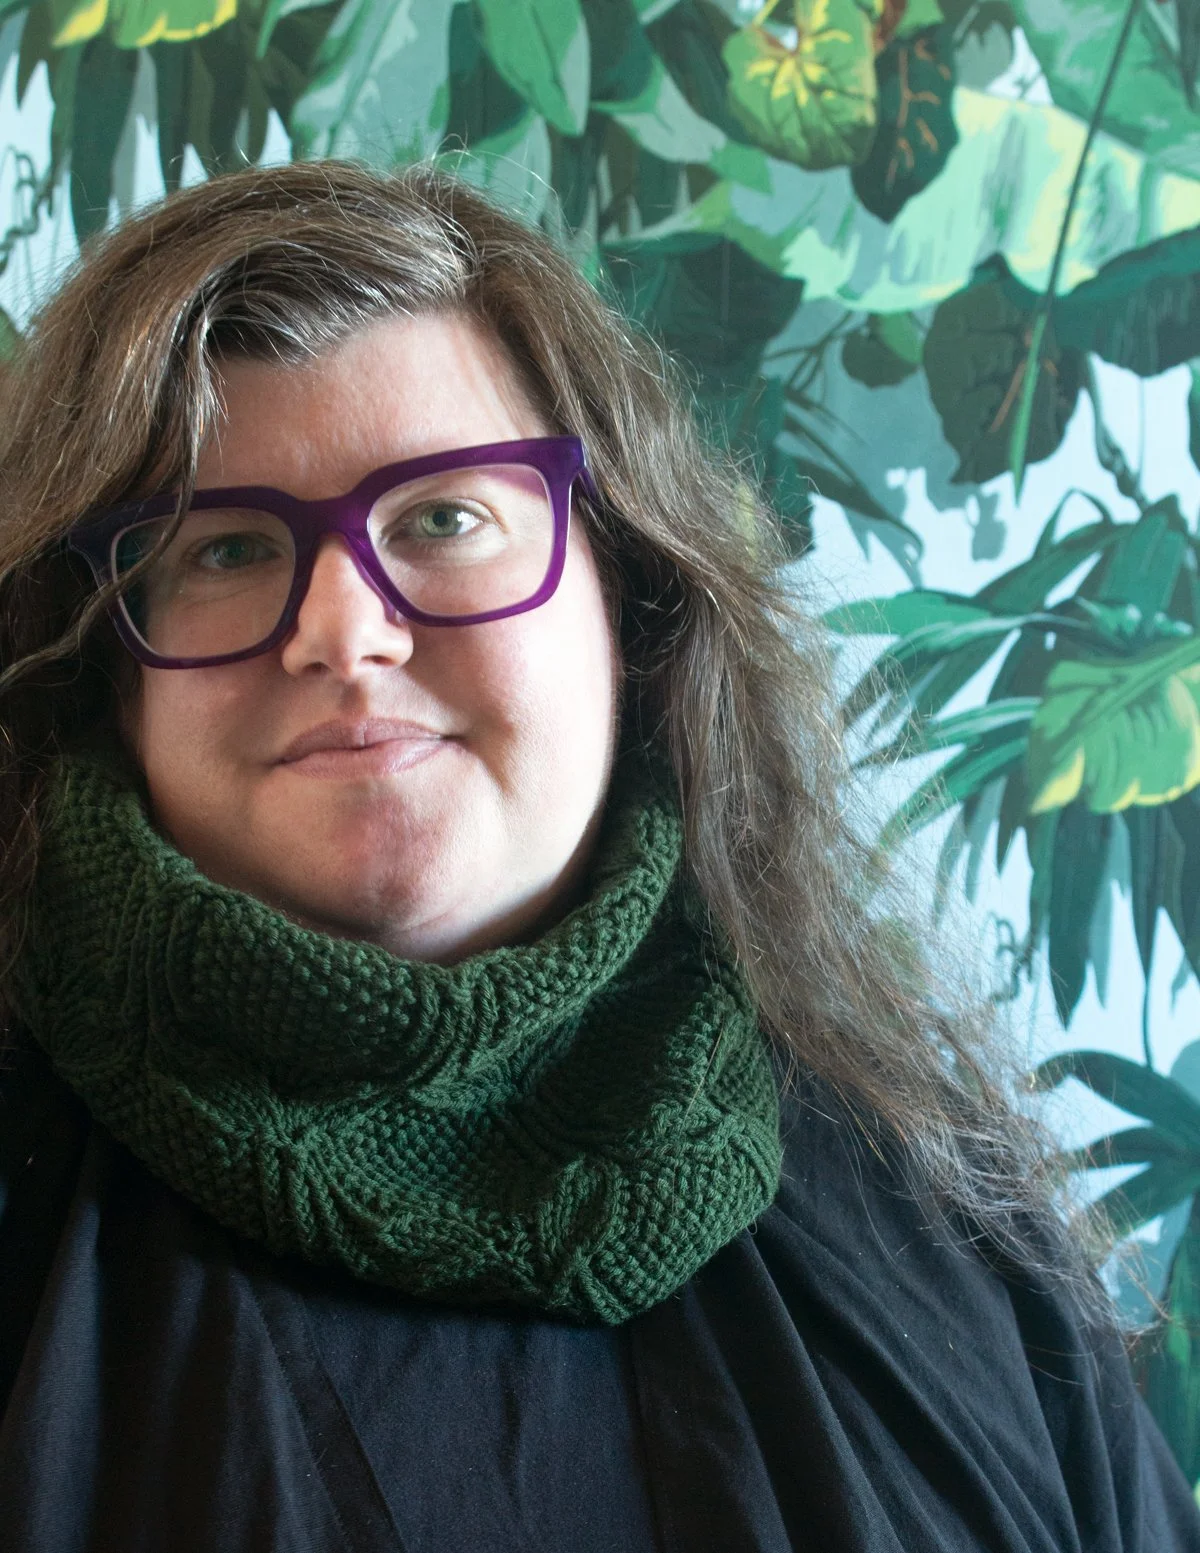

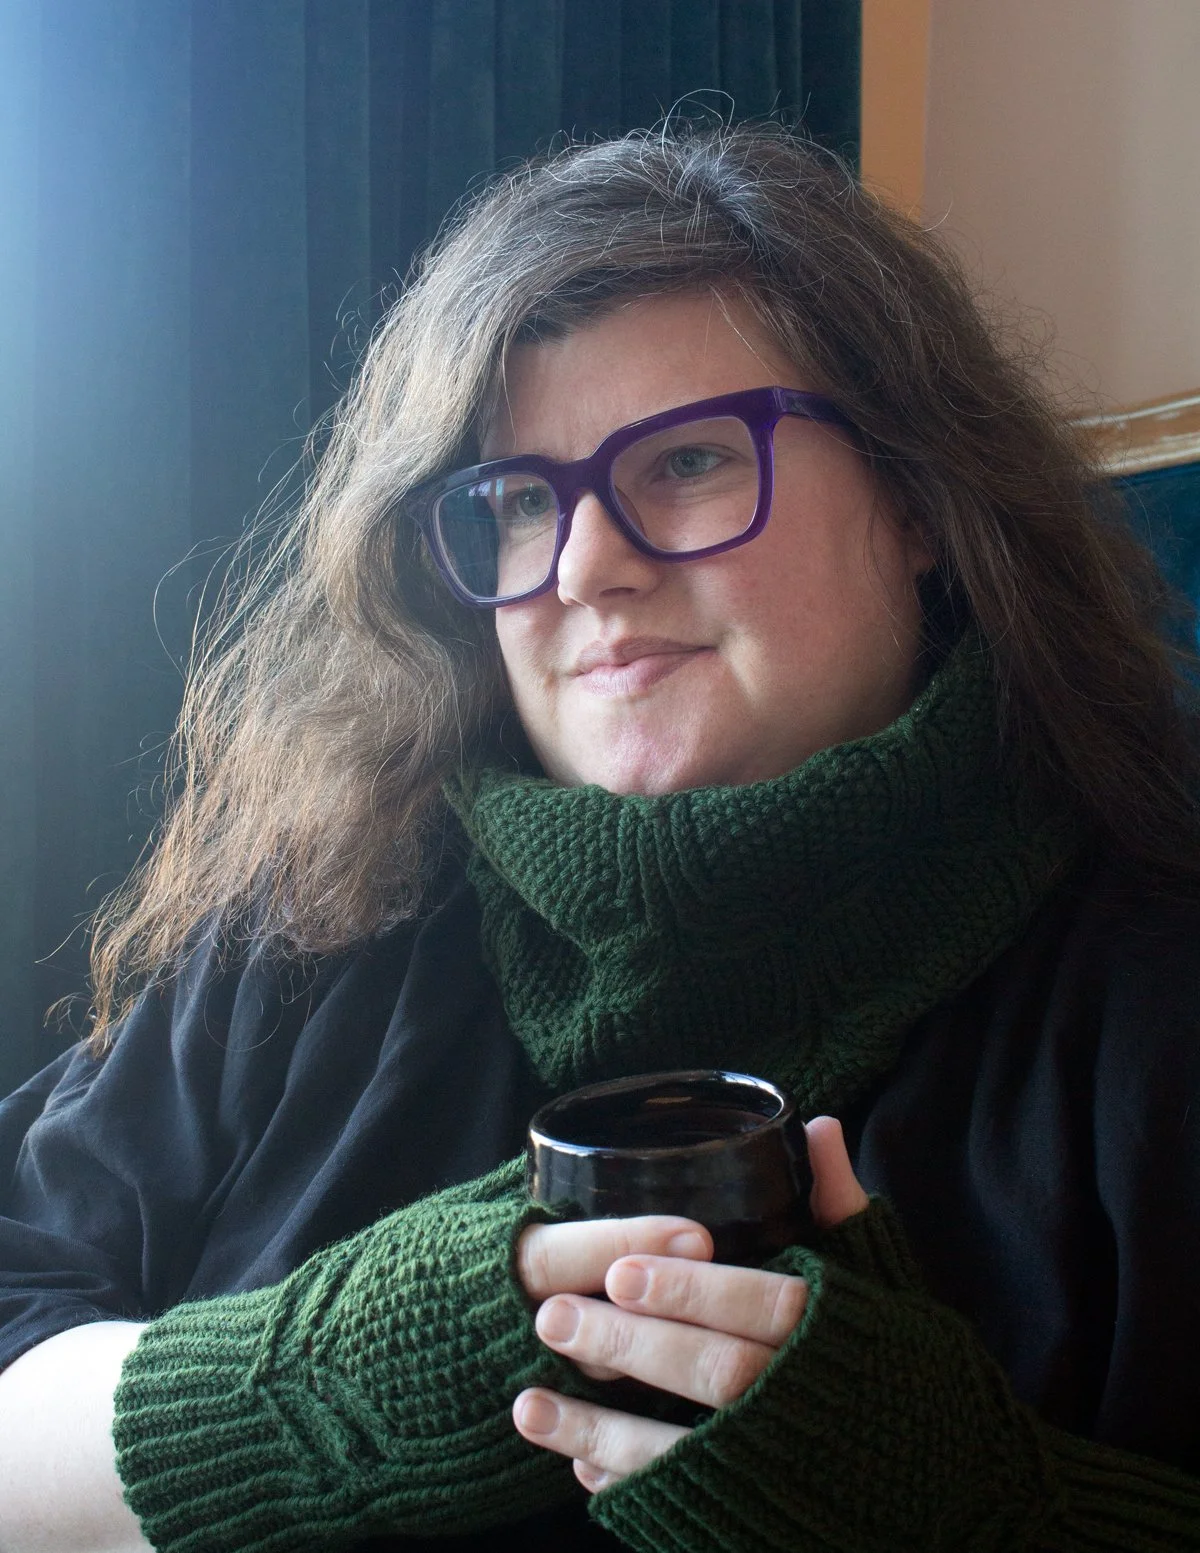
Greenery Cowl features:
A short cowl with an all-over leafy pattern on a seed stitch background, knit in the round from the bottom up
One size, easily adjustable to your preference
Requires 305 yds/279m of DK weight yarn (shown in ChristalLK Peregrine DK)
Dimensions after blocking: 26”/66cm circumference, and 9.5”/24.25cm height from cast on to bind off.
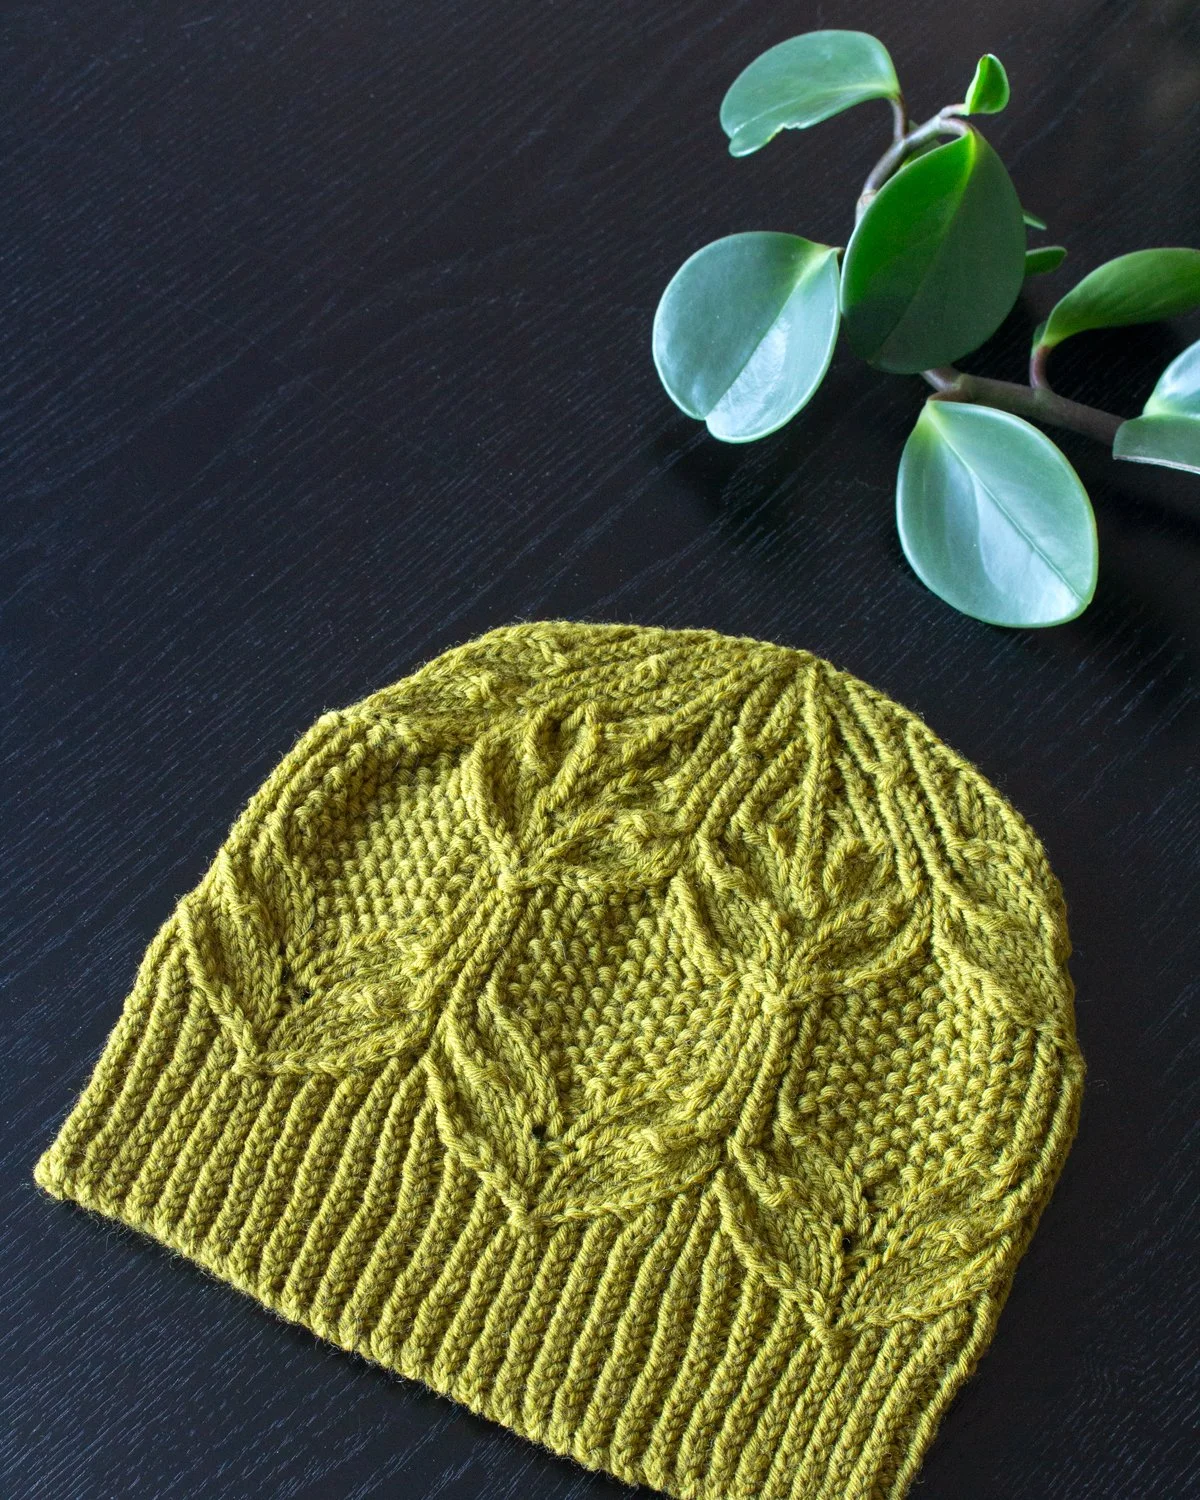
Greenery Hat features:
A beanie with an elegant leaf-and-seed-stitch texture emerging from a half-twisted ribbing brim, knit in the round from the bottom up
Three sizes are included, to fit 17 (20, 23)”/43 (51, 58.5)cm head circumference (shown in Size 2)
Requires 126 (162, 202.5) yds/115 (148.5, 185)m of DK weight yarn (shown in ChristalLK Peregrine DK)
Dimensions, after blocking and unstretched: 14.25 (17, 19.75)”/36 (43, 50)cm brim circumference, and 8 (8.5, 9)”/20.5 (21.5, 23)cm long from brim to crown.
Greenery Mitts features:
A pair of fingerless mitts featuring a leaf-and-seed-stitch motif on a background of half-twisted ribbing
Knit in the round from the bottom up, with gusset increases on the palm side only
Four sizes to fit 7 (7.5, 8, 8.5)”/17.75 (19, 20.25, 21.5)cm palm circumference with approx. 0.5-0.75”/1.25-2cm negative ease (shown in Size 3)
Requires 117 (130, 150, 166) yds/107 (118.5, 137.5, 152)m of DK weight yarn (shown in ChristalLK Peregrine DK)
Dimensions, after blocking and unstretched: 6.5 (6.75, 7.5, 7.75)”/16.5 (17.5, 19, 19.5)cm palm circumference, and 7 (7.5, 8, 8.5)”/18 (19, 20.5, 22)cm length from cast on to bind off.

Find out more about my Greenery Cowl, Greenery Hat, and Greenery Mitts patterns, including Ravelry and Payhip purchase options.