New pattern: Rainbow Cake

It's been a while since I released a new hat design, but here we go!

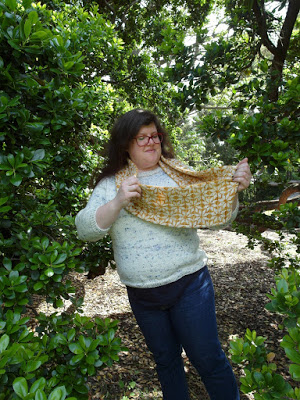
Rainbow Cake is a cosy textured beanie designed to complement speckled or gently-variegated yarn. I really enjoyed knitting the two samples for this design, they went so fast compared to my usual diet of shawls (much as I adore them).

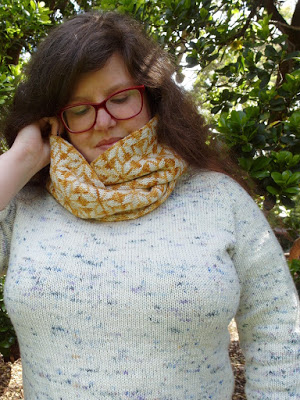
The arcs of ribbing remind me of rainbows, and the seed stitch texture looks like sprinkles when you combine it with a speckled yarn. I used two special skeins of madelinetosh yarn for these hats: one skein of Pure Merino Worsted in 'Pocket Rainbow' for the small sample, and one of 80/10/10 Worsted in 'Holi Grunge' for the large one. I really love the colour-pooling in the smaller hat, which I managed to achieve after a false start or two - but I'll tell you more about that in another post.

Because you only need one skein of yarn for either size (including the pompom and gauge swatch), a Rainbow Cake hat might be just the thing for one of the single skeins in your stash...

The two sizes are intended to fit kids with a head circumference between 16-19” / 40.5-48.5cm (Small size), and adults with a head circumference between 20-23” / 51-58.5cm (Large size).

Features:

  • texture made up of arcs of ribbing and seed-stitch panels

  • topped with an an optional pompom

  • a quick one-skein project, perfect for gift knitting

  • two sizes, for children and adults

  • requires one skein of worsted-weight yarn

  • suitable for speckled, semi-solid, or variegated yarn

  • pattern includes full written instructions as well as charts.

Find out more about my Rainbow Cake pattern, including Ravelry and Payhip purchase options.


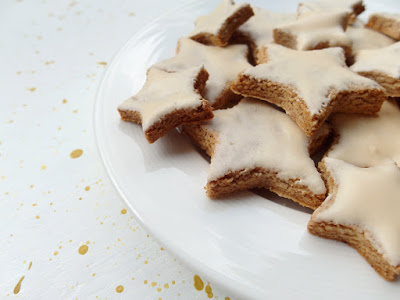
If you're curious which recipe I used for my delicious photo props, it's the classic vanilla cupcake recipe from the Edmonds Cookbook, with my favourite lemon icing. Serious 80s birthday party nostalgia!

New pattern: Cinnamon Stars

Cinnamon Stars is my final new pattern release of 2016, and I must say it's one of my favourites! It's a very soft and cosy tubular cowl with a liberal dusting of colourwork stars. Knit up in the rich hand-dyed colours of Manos del Uruguay's Silk Blend Fino, it looks almost good enough to eat...

This yarn is a luxurious blend of 70% merino and 30% silk, in a single-ply construction which has enough fuzziness to it to produce a great colourwork fabric. I used one skein of 'Gilt' for the background colour and one of 'Ivory Letter Opener' for the star motifs, with plenty left over for swatching since Fino comes in generous 490-yard skeins.

I've been working on my 'travelling cowl' on and off since March - it even came to Europe with me, and kept me busy on the long train ride through the Alps. After taking it to New Zealand a few months later and then back to Australia, I finished it at last! That's what I call a well-travelled WIP. Now, with my northern-hemisphere knitting friends in the midst of winter, it's the perfect time to release a decidedly cold-weather pattern like a tubular cowl.

Doesn't it look great with my speckled Blank Canvas jersey? I think I've found my 'look' for Winter 2017. :)

Features:

  • an all-over pattern of colourwork stars

  • knit in the round beginning with a provisional cast on

  • grafted into a seamless loop to finish

  • one size, with easily adjustable circumference

  • requires two skeins of fingering-weight yarn in contrasting colours

  • solid or semi-solid-dyed yarns are ideal

  • pattern includes tips for swatching in the round, a crochet provisional cast on, and Kitchener Stitch or grafting

  • the colourwork motif is charted only.

I have a couple of tutorial posts coming up for you, on swatching colourwork in the round, and the crochet provisional cast on. And this is the Kitchener stitch tutorial that I always go to when I need a refresher: Knitty's Kitchener Stitch tutorial.

Find out more about my Cinnamon Stars pattern, including Ravelry and Payhip purchase options.

The biscuits were a fun little project - edible photo props are definitely the best kind. I used the Cinnamon Stars (Zimtsterne) recipe from one of my favourite baking sources, Ladies A Plate. They were actually easier than I anticipated after examining the recipe, I had no trouble rolling out the almondy meringue dough and cutting out the little stars. They taste amazing too, and the remaining ones are still crisp now, after almost two weeks. Pssst Mum - they're gluten free! ;)

Baubles

Yup, the Christmas variety. I made some pretty red-and-white decorations to hang on the wall - I think they're very cute and traditional-looking!


The birds are knitted, using a pattern called Bluebird of Happiness, and the hearts are crocheted Danish Hearts. The birds are seamless, and fairly fast and easy if you're comfortable with short rows. The hearts took more time, but I love them! I used to make paper ones as a kid - there's a very simple tutorial here (found via tiny happy).

I think the Christmas fumes must have gone to my head, because I've ordered two big balls of red and off-white cotton yarn to make more decorations!
I'm trying to decide between these cute crochet patterns (all free):

In garden news, our sweet-peas are flowering and smelling amazing, and my baby alpine strawberry plants are getting bigger. And our cherry tomatoes have just started producing ripe ones! I planted a mixed 6-plant punnet of cherry tomatoes, so I'm not sure what varieties we have. The ones with colour on them are all yellow so far.

The first harvest:


The dwarf sunflowers are adding colour too. Yay for yellow. :)

Spot the bee buzzing off!

Icy goodness

Inspired by Melissa of tiny happy, I bought some ice-block moulds and am amusing myself coming up with flavours. I'm keen to try her Piña Colada combo, next time the moulds are free!

Here are two mini 'recipes' of my own. I found they weren't overly sweet (which suits me), but you might want to add more sugar if you have a sweet tooth. Each recipe makes enough for 6 ice-blocks.

Apple Cinnamon
1 tin apple slices/chunks (unsweetened)
1/2 cup apple juice
1 Tbsp brown sugar (or more, to taste)
1/2 tsp ground cinnamon

Coconut Rough
1 cup milk 
1/2 tin coconut cream
2 Tbsp drinking chocolate powder (or more, to taste)

Instructions: Whizz all ingredients in a blender, pour into ice-block moulds (leaving 1/2 inch at the top for expansion). Freeze for 4 hours.


Now if only I could figure out how to eat them without getting drips down my front... Obviously I have not yet outgrown the need for a bib. :p

It's alive!

My sourdough starter was very big and bubbly last Friday (right on schedule), but I had to wait till the weather cooled down a bit before trying it out in a bread recipe. Using the oven in over-30°C heat was not gonna happen. :p

We started the process on Tuesday, mixing the dough according to the recipe in extra curricular - plain white flour, wholemeal flour, water, and sourdough starter. I also 'fed' the remaining starter with more flour and water and put it back in the fridge for next time.

Yesterday, I floured the risen dough and left it folded in a clean tea towel to rise some more. Then in the evening I baked it, and we scoffed the lot with butter and honey and assorted jams, while the bread was still warm. :)

A lively starter (side-view)

Cook's-eye-view

The dough, well-kneaded by Willie

After 12 hours or so rising time

After flouring, and rising for another 4 hours

Bread!

Much softer inside than it looked, but quite a dense bread.

I imagine the bread would have been rather brick-like if we'd left any till the next day, but it was lovely while still warm and moist inside. Next time, I want to try using 'high grade' or bread flour (if I can find any), and leave it to rise for longer. I figure that will give me a slightly lighter result.

Both the method and the flavour of sourdough bread are different from the yeasty bread I've made in the past (mostly with a no-knead method). I like the long rising times with the sourdough, because it doesn't feel like a big job to make a loaf of bread, just a few small spread-out steps. My kind of baking!